I have been meaning to share this for a while, but it was such a huge task I kept putting it off. Greg suggested I break in into pieces (he’s so smart), so I’m going to share our five and a half year remodel journey, room by room. Going back through these pictures, the transformation still shocks me (even though we did most of the work).
When we moved to Tulsa, we moved into an apartment because we didn’t know where in the city we wanted to live. We signed a year lease (May 2016) and then renewed it once. No plans were in the works until in November 2017 when it felt like we took a hard right turn when God said to buy this house.
Okay, cool. We’re buying a house… from 1982… where everything in it looks like it’s 1982 still… full remodel… got it. It’s going to be great.
We closed on the home December 21, 2017. Almost 3400 square feet with 4 bedrooms, 3 bathrooms, 2 living rooms, upstairs and downstairs glassed in patios, etc. It was a LOT for just Greg, Tigger, and I. We knew it needed a lot of work and I had grand plans of all the changes I wanted to make, even moving non-loadbearing walls. God shared one word with us – Restore. That put my grand plans to bed and we started the process of restoring the home in a modern style. With so much to do, I planned to just do room by room, and started with the smallest room – my closet.
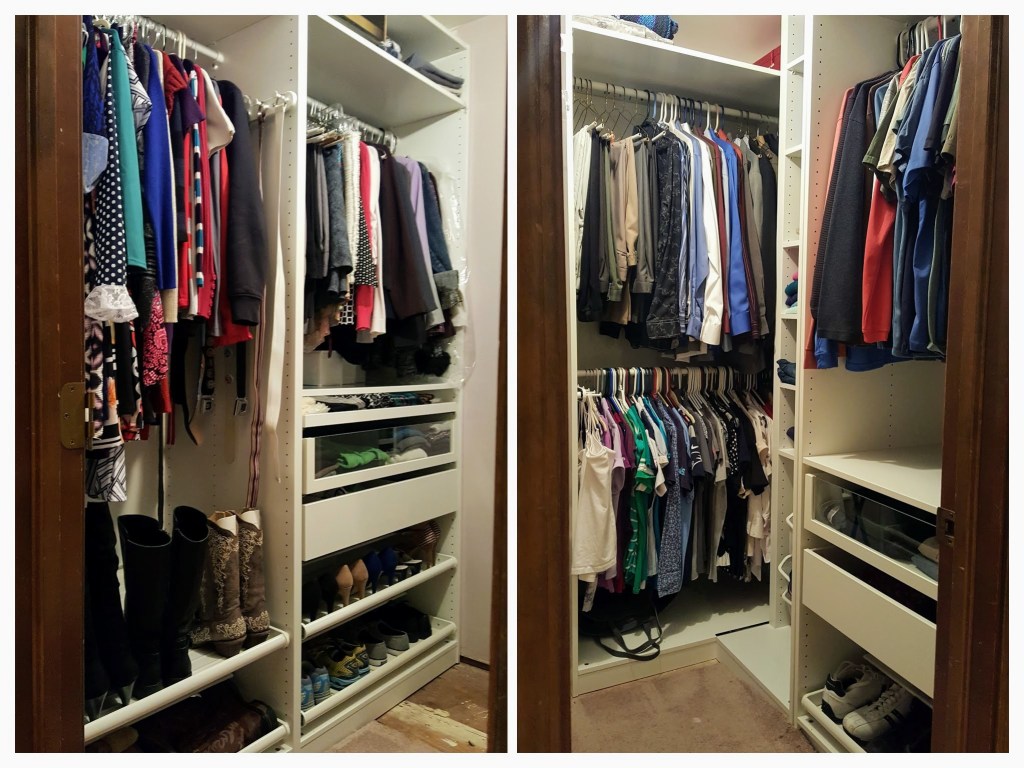
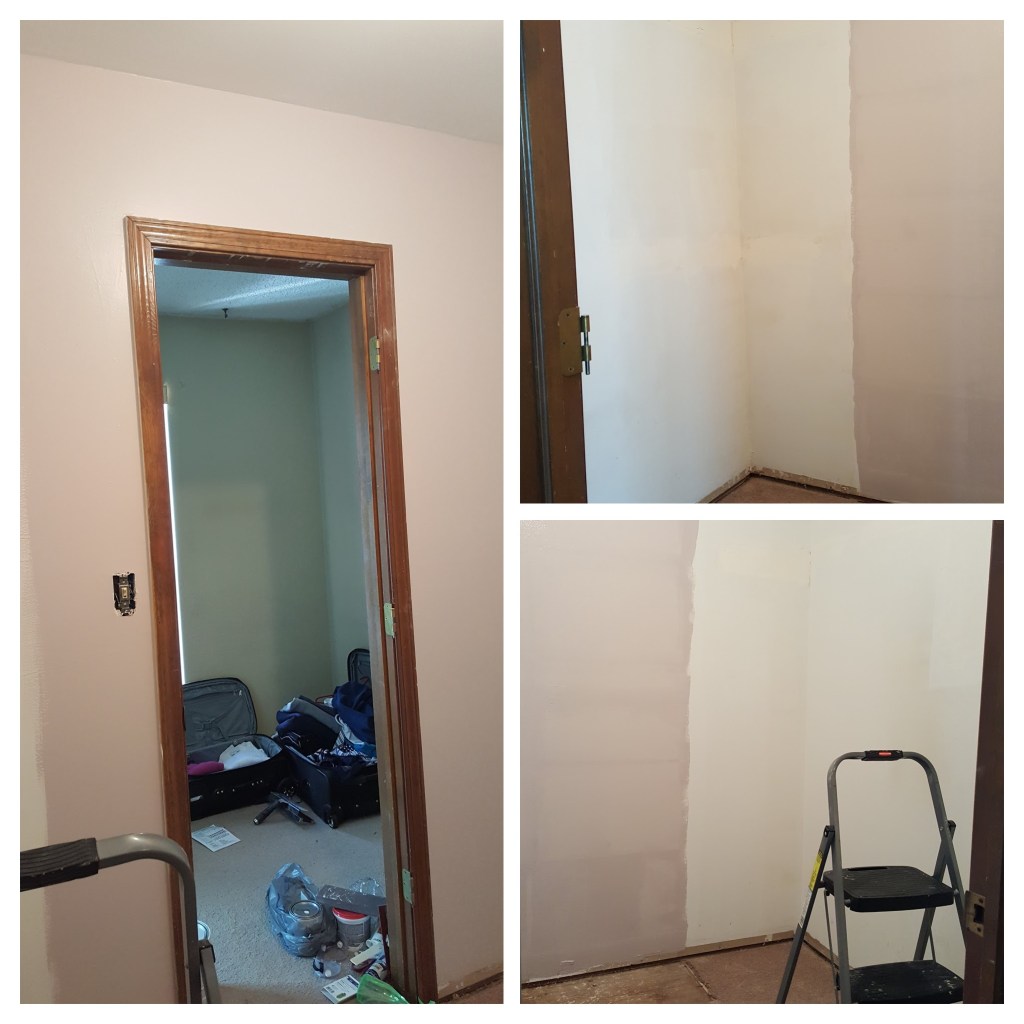
I didn’t even want to move into the master closet, at all. (Note the suitcases and boxes in the photos) I despised it. I think if the shelves would have been smooth and not rough, painted OSB board, it would not have been too bad. Sliding my hand on the shelf gave me a splinter! There were large open cubbies at the back of the closet of the same type of material, that were too wide for 1 rows of folded clothes, but not wide enough for 2 rows. The bars to hang clothes were bowed and the plastic holders for them cracking.

New Year’s Weekend I was going to be in Dallas for a wedding, so I went a day early to design and purchase an IKEA closet system. Best idea ever. The pieces were packed so tightly in the Murano, I could barely fit to drive it! I hauled it all home and started to work deconstructing the closet.

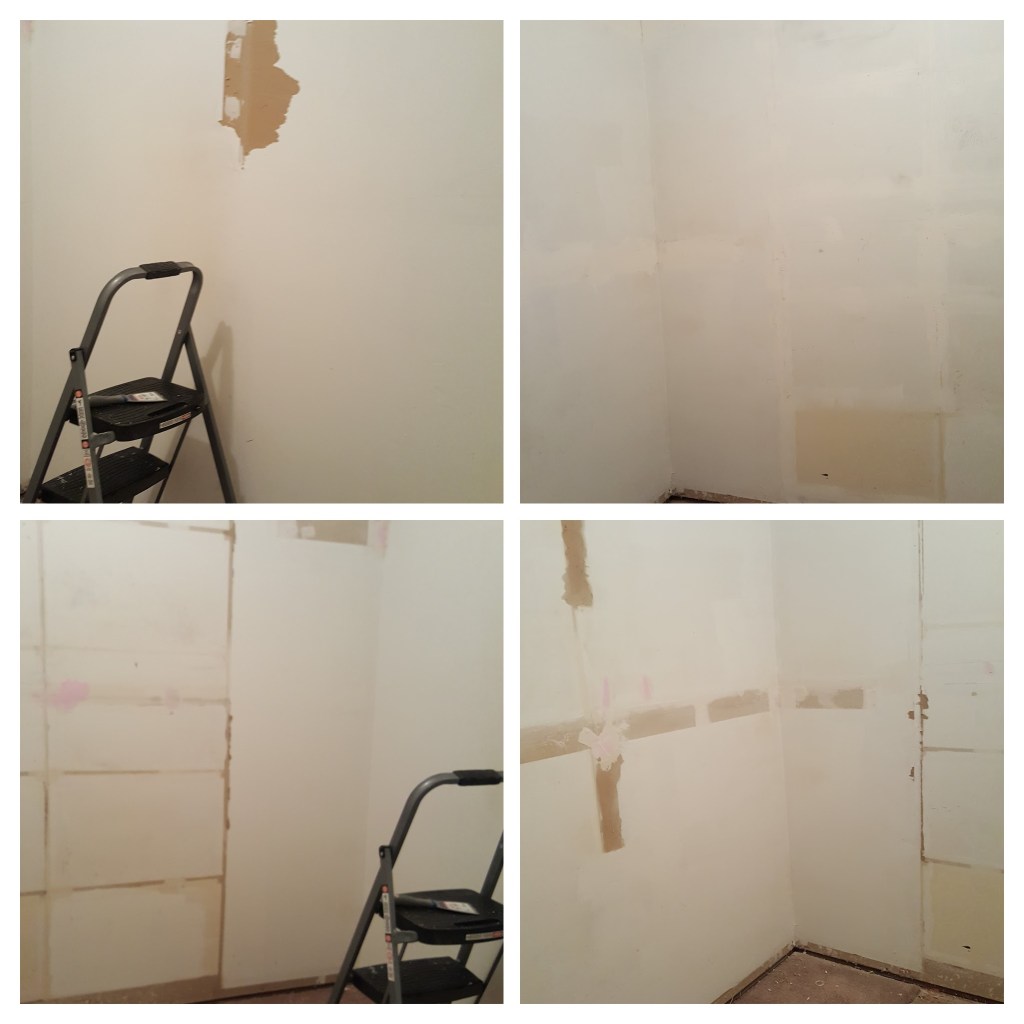
Removing the shelving, I found out they installed it, THEN textured and painted the walls. This meant I had some work to do to get the walls smooth again. Thankfully, the new system was going to cover most of the uneven walls. A little drywall mud and primer later, and I was good to paint.
Since the closet system covered most of the wall space, I only painted what I thought would be needed with a pretty light mauve color that I found on the returned paint rack (LOL – my cheap butt). The doorframe was staying for the time being because that was a much bigger project. I saw a photo of an open closet concept that I wanted to do, but was going to wait and do that when I did the master bath, since that doorframe would be opened up as well.
Building the IKEA system was easy. I chose the 96″ set so it could be as high to the ceiling as possible. There were 5 pieces, Greg got 1.5 pieces and I got the rest; so, fairly divided. 🙂 It was all going well, even having to tilt the pieces to get them in the door frame, until I messed up on the order. See, most of the units had pull-outs that I specifically designed to go in certain places so I could attach a mirror to the wall and not have it block any of the pull-outs. I couldn’t get the unit in the way out of the way without dismantling something or contorting myself into awkward positions and moving them around each other a few inches at a time. So, some smashed fingers later, it was fixed.

Remember how I said they installed the shelving and then did the texturing and painting? Well, the same for the carpet – notice the bare spot of floor where the old shelf used to sit. I cut the carpet under all the units so they would fit and planned to tile when I did the bathroom, since it was next on the list.
Well, the bathroom didn’t get done until almost 5 years later, so that piece of subfloor showed the whole time. Meh, it was my closet, so I’m not exactly showing that off to everyone.
While this room wasn’t ‘done’ it was done enough to move into it and so I called it complete (for now).
Project completion time: About 2 weeks.

Leave a comment